

The Personalizer Node: Bayesian Personalization for Frozen EEG Trunks in Nimbus Studio
Introduction
Training an EEG decoder from scratch on every new user is the calibration tax that keeps BCI out of the clinic. A typical motor imagery session demands 150–200 labeled trials before CSP + LDA reaches usable accuracy — and the moment the electrode cap shifts or a user returns the next week, you pay the tax again.
The Personalizer node, introduced in Nimbus Studio alongside nimbus-bci 0.6.0, breaks this cycle with a clean architectural split: a frozen trunk does the heavy lifting of mapping raw EEG epochs to a compact embedding space, and a lightweight Bayesian head learns to personalize that embedding for the individual user. The head adapts in real time via partial_fit — no GPU, no retraining, no full re-calibration.
This post is a hands-on tutorial. By the end you will know how to wire the Personalizer node in Nimbus Studio using REVE or EEGNet as the frozen trunk, how to interpret the BrainState output it produces, and how to connect it to decision_policy for a fully live deployment pipeline.
What the Personalizer Node Actually Does
At its core the Personalizer node wraps any upstream node that exposes an encode(X) → Z interface — most commonly reve or eegnet run in inference-only mode — and attaches a Bayesian classification head to the resulting embedding.
The head is a compact probabilistic model (Polya-Gamma variational Bayes under the hood for multi-class, LDA-style Gaussian for binary) that maintains a posterior distribution over class weights. This matters for three reasons:
- Calibrated uncertainty. Every prediction comes with an entropy and a confidence score, not just a class label. Low-confidence predictions can be gated before they reach the user.
- Cheap online updates.
partial_fitabsorbs a single new labeled trial in milliseconds — no full refit, no gradient steps, no checkpoint overhead. - Population prior initialization. Out of the box, with zero user-specific trials, the head starts from a population prior estimated across training data. This gives you a working decoder at session start, before any labeling.
Building the Pipeline: Step by Step
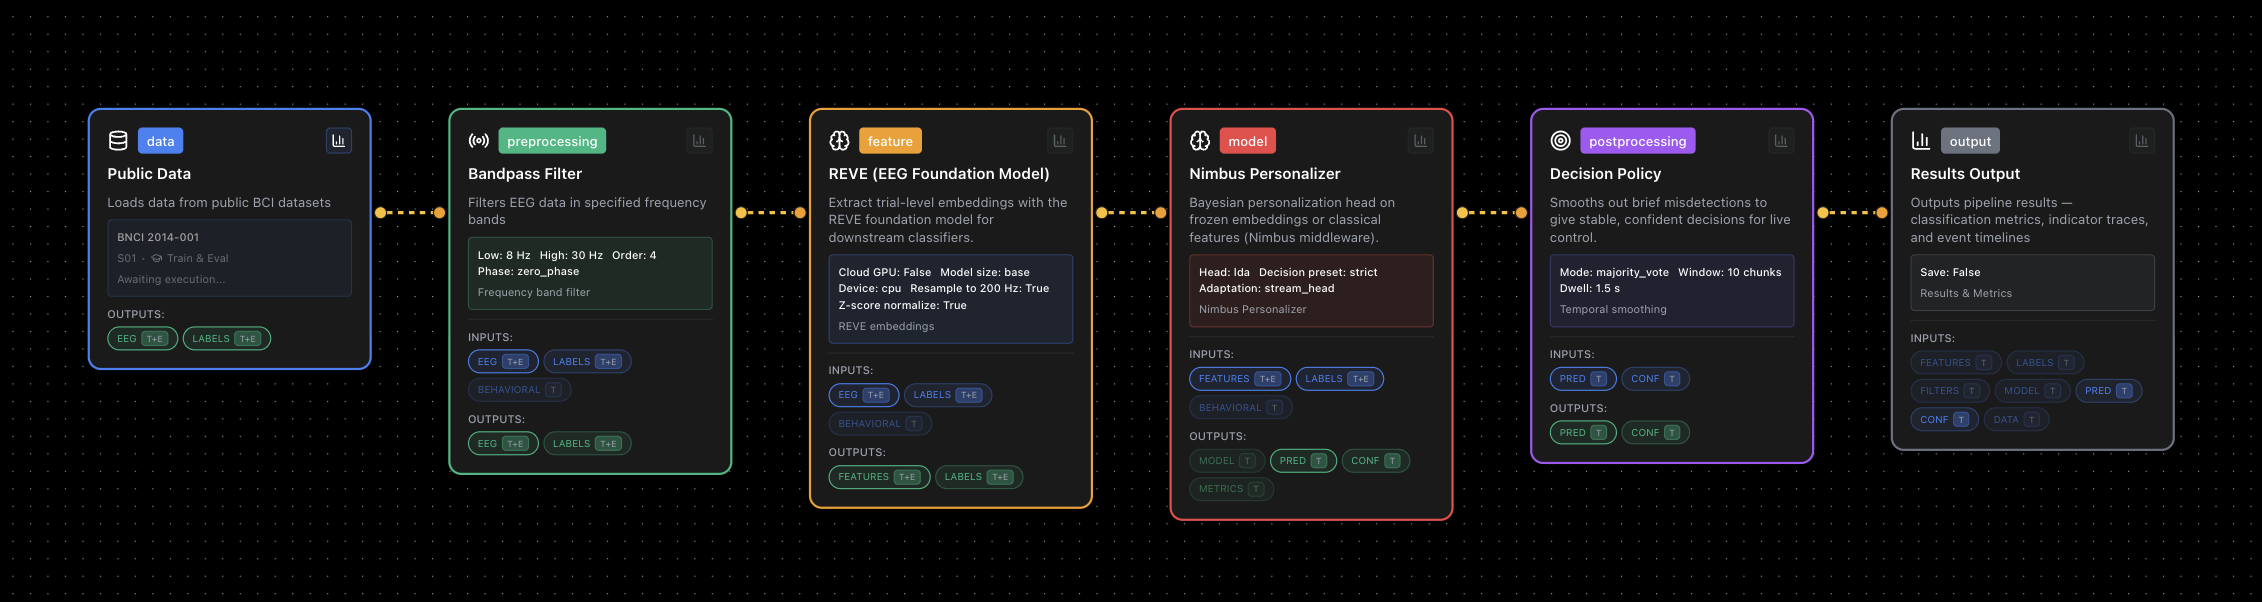
Open Nimbus Studio and create a new project. The pipeline below works for motor imagery; the same wiring applies to P300 or SSVEP with appropriate upstream changes.
Step 1 — Preprocessing chain
Drag in the standard preprocessing stack:
hardware_device(live) orcustom_data(batch calibration)highpass→bandpass_filter(8–30 Hz for motor imagery)asr(optional but recommended — real-time artifact subspace reconstruction)epoching— lock to trial events with a 0–1 s post-stimulus window
Connect them in sequence. Nothing unusual here; this is the same preprocessing you would use with CSP.
Step 2 — Frozen trunk
Drop in either the reve node or the eegnet node. In the node settings panel, set the Mode toggle to Encode only (frozen). This tells Nimbus Studio not to schedule the trunk's weights for training — they are treated as a fixed feature extractor.
If you choose reve, point it at a pretrained checkpoint (Studio ships with a default public one). For background on REVE as a learned signal representation in Nimbus Studio, see EEG Foundation Models in Practice. If you choose eegnet, you can load a checkpoint from a previous full-training run or use the Studio-provided initialization. Both nodes expose a latent_dim output that feeds forward.
Why freeze? The trunk encodes population-level EEG structure that generalizes across subjects. Retraining it per user destroys the generalization and brings back the calibration cost. The Bayesian head is the only piece that learns user-specific information.
Step 3 — Personalizer node
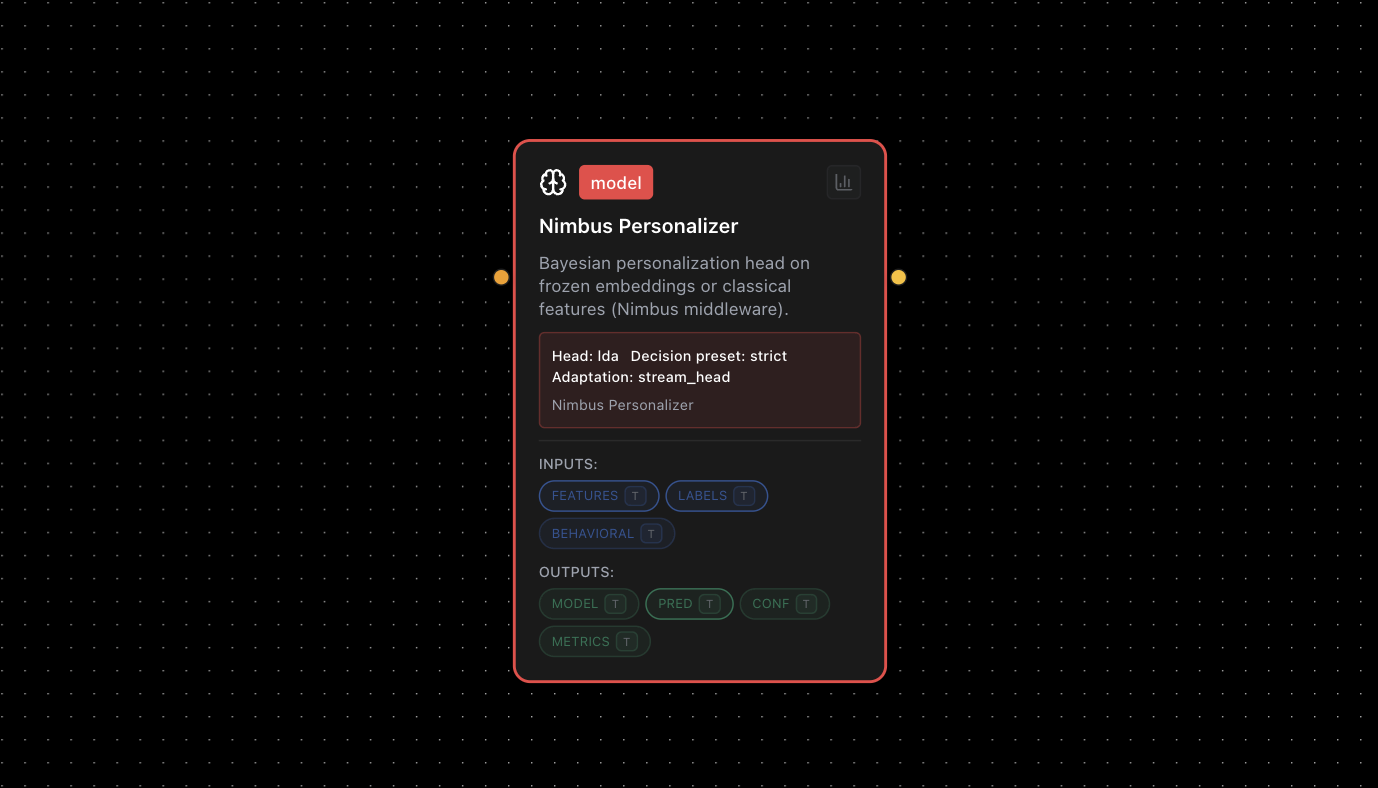
Drag Personalizer from the Model category. Connect the trunk's output to Personalizer's input. In the settings panel configure:
| Setting | Options | What it controls |
|---|---|---|
| Head | Nimbus LDA (default) / Nimbus QDA / Nimbus Softmax | The Bayesian classifier sitting on top of the trunk's embedding. |
| Decision preset | Strict (default) / Permissive / Aggressive | How aggressively low-confidence or high-uncertainty trials are rejected before they reach the app. |
| Adaptation | None / Stream head / Gated stream / Affine + head / BaLoRA | What the node may update while a Deploy session is running (see below). |
| Transform (advanced) | None / Standardize / Whiten / CORAL / Affine / RPA / Euclidean alignment | Optional alignment of the embedding before the head, for a shifted session. |
| Gate tau (advanced) | Number (default 0.5) | The mean-shift threshold that Gated stream uses to decide when a label is worth spending. |
The class list and count come from the labels wired into the node, so they follow your paradigm automatically.
What each Adaptation option does
| Adaptation | Behaviour in session |
|---|---|
| None (frozen after Build) | Inference only — nothing changes. A fixed baseline. |
| Stream head (default) | The head keeps learning from each confirmed trial; the encoder itself is untouched. No GPU, no retraining. |
| Gated stream | Stream head, but the node first measures how far the session has drifted and only learns once the shift crosses the Gate tau threshold. Use it when labels are scarce or noisy. |
| Affine + head | Realigns the embedding to the current session before the head learns — recovers a consistent shift such as a cap that moved, a new day, or a new montage. |
| BaLoRA | Makes small, controlled changes inside the encoder for larger shifts the cheaper modes cannot handle. It needs an encoder upstream; on a features-only graph it falls back to Stream head until an encoder is wired in. |
How to choose
Start with Stream head — the product default, and enough for most live sessions. Move to Gated stream when you want to avoid spending labels on noisy or artifact-heavy stretches, to Affine + head when the shift is consistent rather than random, and to BaLoRA only when the simpler modes still cannot recover performance, since it costs more compute and needs the encoder present.
If the shift is better handled as an alignment step than as a head or encoder change, pick a Transform — the node offers Standardize, Whiten, CORAL, RPA, Euclidean alignment and Affine, and these pair naturally with Affine + head.
Separately, you can decide whether the node forgets what it learned when the session ends or carries that progress into the next session.
The Personalizer node exposes a BrainState output object that subsequent nodes read.
Step 4 — Reading BrainState
BrainState contains:
predicted_class— argmax class labelconfidence— posterior probability of the predicted classentropy— uncertainty across classes (lower = more certain)rejected— boolean flag set by the node when confidence falls below the configuredrejection_threshold
Connect the BrainState output to the decision_policy node. Set min_confidence to something reasonable for your paradigm (0.70–0.80 for MI, 0.65 for P300 where trials are faster). The decision_policy node will gate low-confidence outputs and optionally accumulate posterior evidence across multiple epochs before committing to a command. For a deeper look at entropy thresholds and rejection policies, see Confidence-Gated BCI.
Step 5 — Online adaptation
For live sessions, enable Adaptive Deploy and begin with the safest useful option: let Personalizer learn only from trials that pass its quality checks. If labels are always reliable, it can learn from every confirmed trial instead.
If simple learning is not enough, move up gradually. First let Personalizer correct a consistent shift in the session, such as a cap moving slightly. Only consider careful encoder fine-tuning when the simpler options still cannot recover performance. You can also turn adaptation off whenever you need a fixed comparison baseline.
For production-safe drift checks, guarded updates, and rollback, see Conductor.
During offline evaluation, Studio learns only from the training data and keeps the test data untouched, so the reported results remain fair.
Connecting to the Nimbus Python SDK
For engineers who want programmatic control outside the Nimbus Studio UI, the same pipeline is accessible through the SDK's Personalizer class:
from nimbus_bci import Personalizer, wrap

# Wrap a pretrained REVE or EEGNet trunk (encode(X) -> Z)
enc = wrap(model.encode, model_id="reve")
personalizer = Personalizer.for_deployment(enc, ["left_hand", "right_hand"])

# At session start — zero-shot prediction from population prior
brain_state = personalizer.predict(Z_epoch)  # Z = trunk embedding

# After a labeled trial arrives
personalizer.partial_fit(Z_epoch, y=label)
The BrainState object returned by .predict() mirrors exactly what the Studio node produces: confidence, entropy, rejected, and predicted_class. This parity means you can prototype in Studio and graduate to SDK-level scripting without re-architecting the pipeline.
For streaming deployment in Nimbus Studio, the Conductor.for_deployment safety runtime (added in 0.6.0) wraps the Personalizer and adds ShadowGuard — preventing the online head from adapting in a direction that would degrade safety-critical properties.
Conclusion
The Personalizer node resolves the central tension in applied BCI engineering: users need to start immediately, but decoders need data to be good. By separating population-level feature learning (frozen trunk) from user-specific adaptation (Bayesian head), Nimbus Studio gives you a pipeline that is both zero-shot usable and continuously improving.
The key takeaways for engineers:
- Freeze the trunk — do not retrain REVE or EEGNet weights per user; freeze them and let the Bayesian head do the personalization.
- Read BrainState, not just labels — confidence and entropy are first-class outputs that unlock
decision_policygating and graceful degradation. - Start with the smallest useful change — use safe, trial-by-trial learning first; move to session realignment or encoder tuning only when needed.
- Learn only from trustworthy feedback — 30 reliable trials can be enough to reach the accuracy that traditional pipelines need 150 trials to match.
- Carry progress forward when useful — teams running repeated sessions can save what Personalizer learned instead of starting over each time.
- Studio and the Python SDK stay in sync — a pipeline built visually can also be controlled and extended in code.
Cross-session profile management will be the subject of a future post.